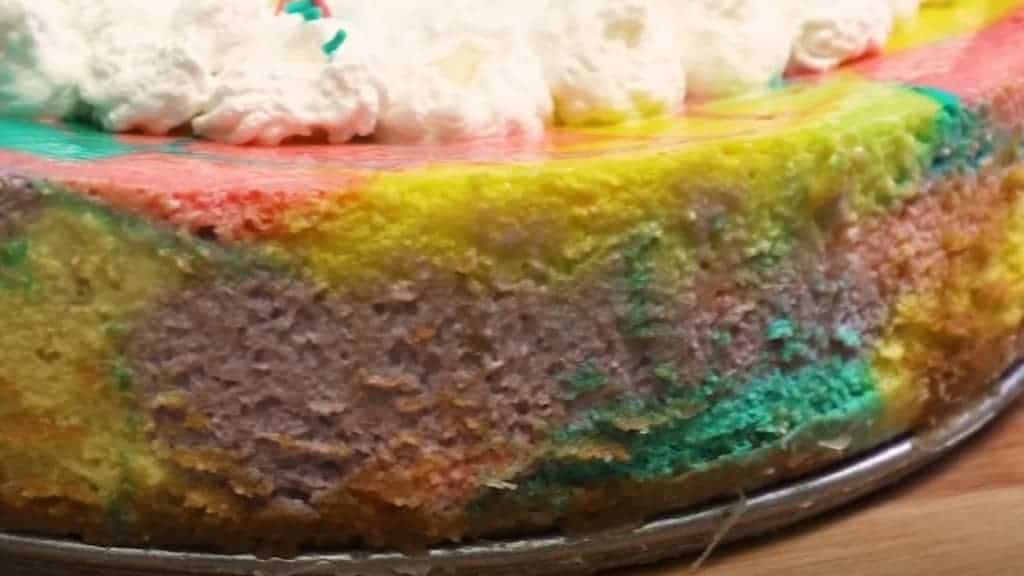
Everyone loves a good cheesecake, but making a beautiful tie-dye version takes it to the next level. Not only will it wow your guests with the bright colors, but it also tastes delicious! To make this eye-popping dessert, you will need to add some food dye to the normal recipe. Sometimes, baking or cooking feels like a chore, but we guarantee you’ll have a blast making this cheesecake.
Cheesecakes come in all flavors and varieties, such as blueberry, strawberry, chocolate, or peanut butter. This one will be plain, but feel free to add any topping you’d like. Now, on to the recipe!
Here’s how to make a delectable tie-dye cheesecake:
Let’s take a look at how to make this fun, colorful…and delicious… tie-dye cheesecake.
What you’ll need:
- Food processor
- Electric hand mixer
- Six small bowls
- Spatula
- Cake pan
- Larger mixing bowl
- Small spoon
- Aluminum foil
- Baking sheet
- Piping bag
- Knife
- Parchment paper
Ingredients for the crust:
- 2 1/2 cups graham crackers
- 1/3 cup melted butter
- 1 tbsp sprinkles
Ingredients for the cheesecake filling:
- 4 1/2 cups cream cheese
- 1 cup granulated sugar
- 1/4 tsp salt
- 1 tbsp vanilla
- 4 eggs
- 1 cup greek yogurt
- 1 cup heavy cream
- 4-5 gel food colors of your choice
- Hot water
Ingredients for whipped cream topping:
- 1 cup whipping cream
- 1/4 cup powdered sugar
- More sprinkles to add on top
Directions:
- First, blend the graham crackers in a food processor. Pour them into a small bowl.
Next, add in the melted butter and tablespoon of sprinkles, mixing thoroughly.
Now that you’ve made your crust pour it into the bottom of a cake pan lined with parchment paper. Use your hand to press down on the mixture to spread it evenly throughout the pan.
Bake at 325 degrees F for 15 minutes (or until golden brown).
In a large bowl, mix the cream cheese with an electric whisk until it’s nice and creamy. Add in the cup of granulated sugar and blend with the mixer.
Next, add in the salt and vanilla, mixing these thoroughly as well.
Now, put the eggs in the bowl, adding them one at a time. After adding each one, mix with the electric whisk. Use a spatula to scrape any filling off the sides of the bowl.
Next, pour in the Greek yogurt, blending this into the mixture.
Repeat this step with the heavy cream.
Get ready to add color!
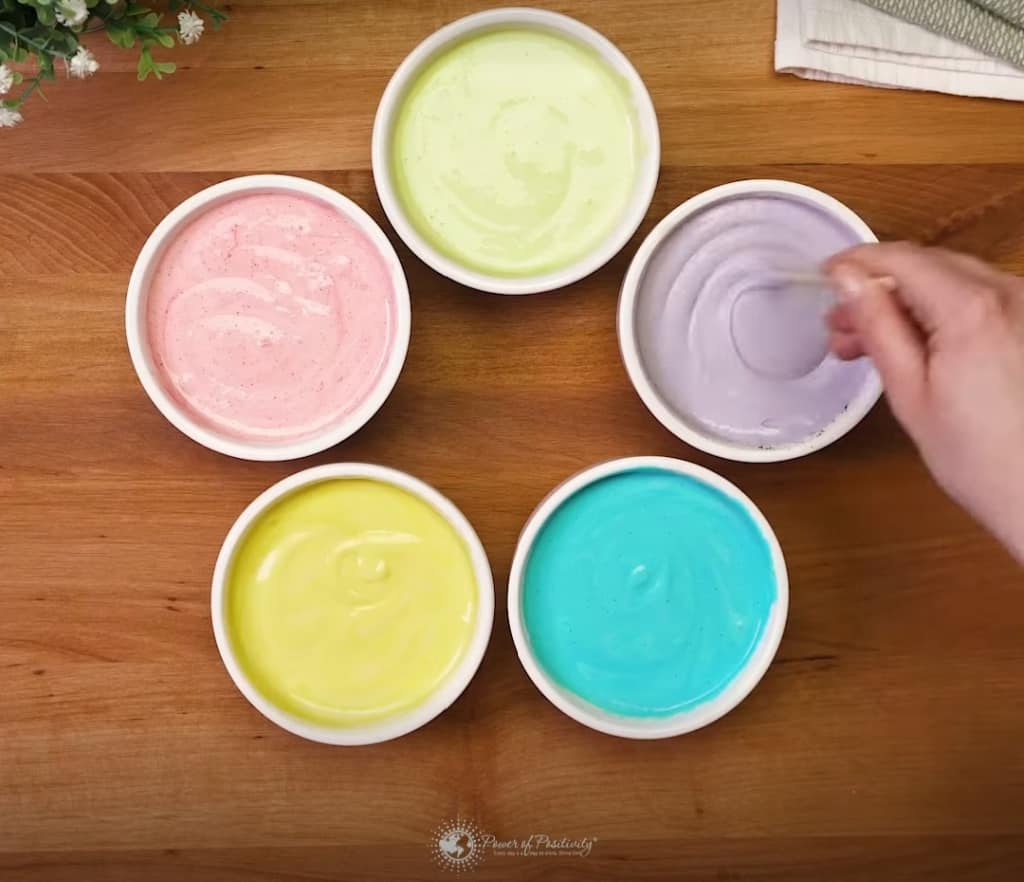
- Your cheesecake filling is now ready for some colors! Separate the mixture into 5 smaller bowls. Add the food coloring of your choice to each bowl, mixing thoroughly.
Get out your crust, and scoop a little cheesecake filling from each bowl onto the crust. Alternate between each bowl to create the tie-dye look, and keep adding layers until the bowls are empty. - Now, use a knife or a chopstick to make horizontal and vertical lines in the cheesecake. Press down gently to create a cool tie-dye design.
- Next, tear off a parchment paper sheet and wrap the bottom of the cake pan with it.
- Place it on your baking sheet, and pour hot water around it to add moisture to the pan.
- Bake at 325 degrees F for 1-1 1/2 hours, then turn the oven off and leave it in for another hour.
- Now, in a large bowl, pour in 1 cup of whipping cream and blend with the hand mixer.
- Pour in 1/4 cup powdered sugar, also mixing this with the electric whisk.
- Use a piping bag to add the whipped topping to the cheesecake. Go all the way around the cheesecake, making a circle with the topping. Leave about an inch of room on the edges of the cheesecake.
- Then, put some sprinkles on top to add a little more color. Refrigerate for at least 8 hours.
- After waiting for it to cool, cut yourself a slice and enjoy the fruits of your hard work!
Tips for making the best tie dye cheesecake ever
- As we said before, you can add whatever toppings you’d like. However, we think the tie-dye effect shows up best on plain cheesecake. If you make the filling chocolate, for instance, the colors wouldn’t show up as well. Putting blueberries, strawberries, or a chocolate drizzle on top shouldn’t be a problem, though.
- You should also make sure to use room-temperature ingredients. This ensures that everything blends up smoothly, so you don’t have any lumps in your cake. Using a hand or stand mixer is also essential to get the batter as smooth as possible.
- Make sure to beat the eggs moderately until just combined into the batter. If you mix them too long, air will start to get into the batter. The air will then expand and contract during the baking and cooling process, leading to cracks.
- Even though we advised using parchment paper on the pan’s bottom, you may want to grease the sides. This way, the cheesecake won’t stick to the sides of the pan.
Pouring the hot water into the pan during the baking process is crucial for preventing cracks. The humidity adds moisture, helping to keep the cheesecake from drying out.
 Final Thoughts: This tie-dye cheesecake will quickly become your new favorite dessert
This cheesecake looks beautiful once it’s done, almost too beautiful to eat! We believe that food is art, and this dessert definitely looks as great as it tastes. Whether you make this for family or a big gathering, we guarantee it will please your guests. The cheesecake should keep for up to five days in the fridge. Just make sure to wrap it tightly in plastic wrap and store it in the original container.
We know that making cheesecake can be a little tricky. But, by following the tips above, you should avoid the most common mistakes. Even a beginner baker can make this cheesecake recipe, so have some fun with it! If you decide to make this mesmerizing dessert, let us know how you enjoyed it in the comments!
